

You don’t need special equipment or canning skills to make crisp, flavorful pickles at home. Refrigerator pickles use simple vinegar brines that preserve vegetables for weeks without any heat processing. You’ll mix basic ingredients like vinegar, water, salt, and sugar, then pour the brine over your chosen vegetables. The process takes just minutes to prep, and most pickles are ready to enjoy within 24 hours. These fifteen tested recipes cover everything from classic dills to tangy pickled onions and spicy Asian-inspired varieties.
Classic Dill Refrigerator Pickles

Classic dill refrigerator pickles offer a crisp, tangy treat that’s remarkably simple to make at home. Unlike traditional canned pickles that require specialized equipment and processing, these pickles rely on the refrigerator to preserve their fresh crunch and vibrant flavor.
The combination of fresh dill, garlic, and a balanced brine creates that unmistakable pickle taste that pairs perfectly with sandwiches, burgers, or enjoyed straight from the jar.
These pickles are ready to eat in just 24 hours, though their flavor continues to develop and improve over the first few days. The recipe yields approximately two quarts of pickles that will keep in the refrigerator for up to two months, making them an ideal solution for using up abundant cucumber harvests or simply keeping a homemade condiment on hand. Having premium cookware sets in your kitchen makes preparing the brine quick and efficient, as quality saucepans heat evenly and bring liquids to a proper boil.
Recommended Products
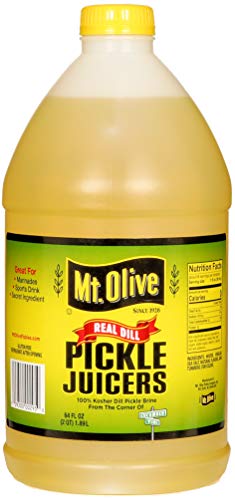
Kosher Dill Pickle Brine: Our world famous pickle juice has always been so good you were tempted to drink it straight out of the pickle jar, so now we’ve made it available to you “straight-up”

Only 5 calories per serving, about 8 servings per jar

BELOVED BOTTLED BRINE. We took the same delicious brine found in our Dill pickles and bottled it for you enjoy.
Ingredients
- 2 pounds pickling cucumbers or small Kirby cucumbers
- 2 cups water
- 2 cups white vinegar
- 2 tablespoons kosher salt
- 1 tablespoon granulated sugar
- 6 cloves garlic, peeled and smashed
- 4 sprigs fresh dill
- 2 teaspoons whole black peppercorns
- 1 teaspoon mustard seeds
- 1 teaspoon coriander seeds
- 2 bay leaves
Instructions
Wash the cucumbers thoroughly and slice them into spears or rounds, depending on your preference.
In a medium saucepan, combine water, vinegar, salt, and sugar, bringing the mixture to a boil over high heat and stirring until the salt and sugar dissolve completely.
Divide the garlic, dill, peppercorns, mustard seeds, coriander seeds, and bay leaves evenly between two clean quart-sized jars.
Pack the cucumber slices tightly into the jars, leaving about half an inch of space at the top.
Pour the hot brine over the cucumbers, making certain they’re completely submerged, and tap the jars gently on the counter to release any air bubbles.
Allow the jars to cool to room temperature, then seal with lids and refrigerate for at least 24 hours before eating.
Tips
For the crispest pickles, use the freshest cucumbers possible and remove the blossom end, which contains enzymes that can soften pickles.
If your cucumbers are larger, cut them into uniform pieces to guarantee even pickling.
The brine can be poured over the cucumbers while hot or cooled to room temperature first—hot brine speeds up the pickling process slightly but may result in slightly softer pickles.
Feel free to adjust the garlic and dill quantities to suit your taste preferences, and experiment with adding red pepper flakes for a spicy variation.
Bread and Butter Refrigerator Pickles

Bread and butter pickles bring a delightful sweet-and-tangy flavor profile that sets them apart from their dill counterparts. These golden-hued pickle slices feature a carefully balanced brine that combines sugar, vinegar, and warm spices to create the classic taste that has made them an American favorite for generations.
The addition of thinly sliced onions adds depth and complexity, while turmeric provides both color and a subtle earthy note. These pickles are particularly versatile, complementing everything from charcuterie boards to hot dogs, and they’re beloved by those who prefer a sweeter pickle option.
The beauty of refrigerator bread and butter pickles lies in their accessibility and quick preparation time. Without the need for water bath canning or special equipment, you can have homemade pickles ready to enjoy in just a few hours.
The recipe makes approximately two quarts and stores well in the refrigerator for up to two months. The crisp texture and bright flavor make them an excellent choice for potlucks, gift-giving, or simply keeping your refrigerator stocked with a homemade condiment that far surpasses store-bought versions. A professional mandoline slicer set can elevate your pickle-making by ensuring perfectly uniform slices every time.
Recommended Products
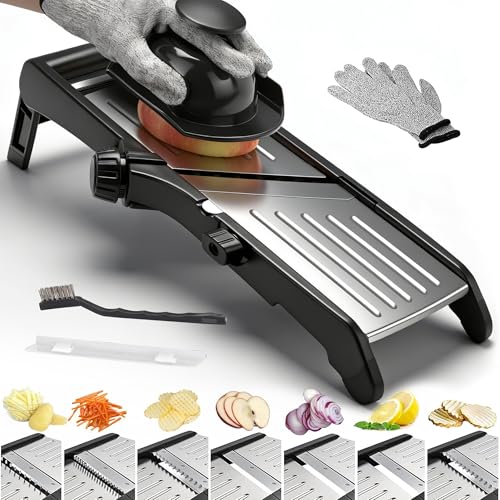
【Mandoline Slicing tool】 Unlike traditional slicers that require handling blades to change settings, this model lets you switch slicing styles without touching the blades. Includes gloves, a food pusher, and a cleaning brush. The base features a silicone wrap for use on flat surfaces. The included gloves offer limited assistance only and do not prevent injury. Always use the food pusher and keep your hands away from the blades.

Contains (1) PrepSolutions Adjust-A-Slice Mandoline in Green – adjustable slicing thickness for all your prep needs.

【Safe Mandoline Slicer】There are no worries anymore about cutting your fingers while using our mandoline food slicer. You can choose slicing options by rotating the knob, no need to touch the blade to change it out. The non-slip handle and feet can stand stably on a smooth surface, also, we have a safety food holder and a pair of cutting-resistance gloves in our mandoline slicer for kitchen set to protect you from any injury. PLEASE WEAR GLOVES WHILE USING!!!
Ingredients
- 2 pounds cucumbers, thinly sliced
- 1 large white onion, thinly sliced
- 2 tablespoons kosher salt
- 2 cups white vinegar
- 1½ cups granulated sugar
- 1 tablespoon mustard seeds
- 1 teaspoon celery seeds
- 1 teaspoon ground turmeric
- ½ teaspoon black peppercorns
- ¼ teaspoon red pepper flakes
Instructions
Place the sliced cucumbers and onions in a large bowl and toss with the kosher salt, then let them sit for 1-2 hours to draw out excess moisture. Drain the vegetables thoroughly and rinse them under cold water, then pat dry with a clean kitchen towel.
In a medium saucepan, combine the vinegar, sugar, mustard seeds, celery seeds, turmeric, peppercorns, and red pepper flakes, bringing the mixture to a boil over medium-high heat while stirring to dissolve the sugar completely.
Pack the cucumber and onion slices into two clean quart-sized jars, then pour the hot brine over them, making sure the vegetables are fully submerged. Gently tap the jars on the counter to release trapped air bubbles, then let them cool to room temperature before sealing with lids and refrigerating for at least 4 hours, though overnight is ideal for full flavor development.
Tips
The salting step is essential for achieving crisp bread and butter pickles, as it removes excess water that would otherwise dilute the brine and create soggy pickles.
Using a mandoline slicer guarantees uniform thickness, which not only looks professional but also guarantees even pickling throughout.
If you prefer less sweetness, you can reduce the sugar to 1 cup, though this will result in a more tangy pickle that strays from the traditional bread and butter style.
These pickles benefit from a day or two in the refrigerator before serving, as the flavors meld and intensify over time, and they’ll remain at peak quality for about six weeks when kept properly refrigerated.
Spicy Garlic Refrigerator Pickle Spears

For those who crave bold, assertive flavors, spicy garlic pickle spears deliver an irresistible kick that transforms ordinary cucumbers into an addictive snack. These robust pickles combine the pungent bite of fresh garlic with the heat of red pepper flakes and jalapeños, creating a flavor-packed experience that appeals to pickle enthusiasts who want something beyond the traditional dill or sweet options.
The whole cucumber spears retain their satisfying crunch while absorbing the fiery brine, making them perfect for eating straight from the jar, alongside sandwiches, or as a zesty addition to a Bloody Mary.
The beauty of this recipe lies in its simplicity and the way the flavors intensify over time in the refrigerator. Unlike canned pickles that require processing, these refrigerator spears are ready to eat within 24 hours and continue to develop complexity over the following weeks.
The generous amount of garlic infuses every spear with aromatic depth, while the combination of vinegar and salt creates the perfect preserving environment. This recipe yields approximately 8-10 pickle spears depending on cucumber size and keeps for up to three months refrigerated, giving you plenty of time to enjoy every crispy, spicy bite.
Recommended Products
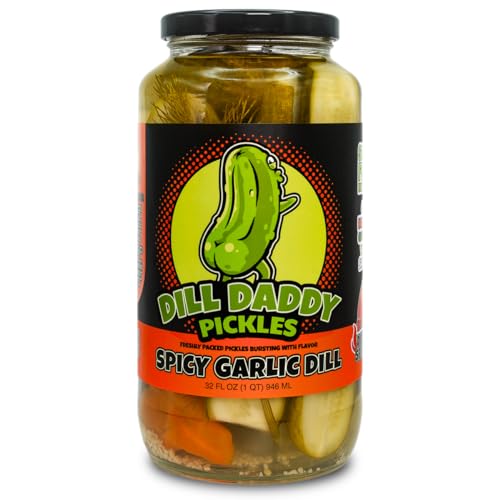
Classic Dill Pickle Taste with a Kick: Enjoy the ideal blend of heat and garlic

One 24 fl oz jar of Vlasic Zesty Dill Pickle Spears

One 24 oz. jar of Vlasic Frank's RedHot Flavored Kosher Dill Pickle Spears
Ingredients
- 4-5 medium Kirby or pickling cucumbers, quartered lengthwise into spears
- 6-8 garlic cloves, peeled and smashed
- 2 jalapeño peppers, sliced
- 1½ cups white vinegar
- 1½ cups water
- 2 tablespoons kosher salt
- 1 tablespoon granulated sugar
- 2 teaspoons red pepper flakes
- 1 tablespoon whole black peppercorns
- 2 teaspoons dill seeds or 4 sprigs fresh dill
- 1 teaspoon mustard seeds
- 2 bay leaves
Instructions
Arrange the cucumber spears vertically in two clean pint-sized jars or one large quart jar, tucking the smashed garlic cloves and jalapeño slices between the spears as you pack them. In a medium saucepan, combine the vinegar, water, salt, sugar, red pepper flakes, peppercorns, dill seeds, mustard seeds, and bay leaves, then bring to a boil over high heat, stirring until the salt and sugar dissolve completely.
Carefully pour the hot brine over the packed cucumber spears, ensuring all vegetables are fully submerged and distributing the spices evenly between the jars. Allow the jars to cool uncovered at room temperature for about an hour, then seal with tight-fitting lids and refrigerate for at least 24 hours before eating, though 48 hours will yield even better flavor penetration.
Tips
The heat level in these pickles can be easily adjusted by increasing or decreasing the amount of jalapeños and red pepper flakes, or by removing the jalapeño seeds for a milder version. For maximum crunchiness, choose firm, fresh cucumbers without soft spots and avoid overripe specimens that have begun to yellow.
If you prefer extra garlic flavor, you can add more cloves without affecting the brine’s preservation properties. The pickles will taste quite sharp and vinegary in the first day or two, but the flavors mellow and harmonize beautifully after three to four days of refrigeration, so patience is rewarded with superior taste. Using a premium cookware set with a quality saucepan ensures even heating when preparing the brine, which helps the salt and sugar dissolve more efficiently.
Asian-Style Refrigerator Pickles

Asian-style refrigerator pickles offer a revitalizing departure from traditional Western pickles, incorporating the bright, complex flavors of rice vinegar, ginger, and sesame that are staples in Asian cuisines. These pickles showcase a delicate balance of sweet, sour, and umami notes, with a lighter, more nuanced flavor profile than their heavily vinegared American counterparts.
The combination of crisp vegetables like cucumbers, daikon radish, and carrots creates a colorful, crunchy condiment that pairs beautifully with rice bowls, grilled meats, sushi, or simply as a palate-cleansing side dish. The gentle acidity and subtle sweetness make these pickles incredibly versatile and appealing even to those who typically shy away from pickled foods.
This recipe draws inspiration from Japanese tsukemono and Korean pickled banchan, creating a fusion that’s perfectly suited to the refrigerator pickle method. The quick pickling process allows the vegetables to retain their vibrant colors and firm texture while absorbing the aromatic brine infused with ginger, garlic, and a hint of heat from optional chili.
Unlike fermented Asian pickles that require days or weeks to develop, these refrigerator pickles are ready to enjoy within a few hours and will keep for up to one month in the refrigerator, making them an ideal make-ahead condiment for weeknight meals or meal prep. For those who frequently prepare Korean-inspired dishes, investing in premium Korean cookware can elevate your pickling and cooking experience with superior heat distribution and craftsmanship.
Quick Pickled Red Onions With Lime

Quick pickled red onions with lime are a vibrant, tangy condiment that has become indispensable in modern home kitchens, elevating everything from tacos and burrito bowls to grain salads, sandwiches, and grilled fish.
The combination of bright lime juice with vinegar creates a citrus-forward brine that perfectly complements the natural sharpness of red onions while mellowing their bite into something sweet, tangy, and wonderfully complex.
The stunning magenta-pink color that develops as the onions pickle makes them as visually appealing as they’re delicious, adding a pop of color to any dish.
Unlike traditional pickled onions that can be one-dimensional, the lime juice adds a fresh, zesty dimension that feels lighter and more contemporary.
This streamlined recipe requires minimal ingredients and comes together in less than five minutes of active preparation time, making it one of the easiest and most rewarding refrigerator pickle recipes you can master.
The onions begin to soften and absorb the tangy brine within just 30 minutes, though their flavor continues to develop and improve over the first few days in the refrigerator.
They’ll keep for up to three weeks when stored properly, though they’re so delicious and versatile that they rarely last that long.
The slight sweetness balances the acidity beautifully, while optional additions like jalapeño or cilantro can customize the flavor to suit your preferences.
After draining the pickled onions, you can use a premium salad spinner bowl to thoroughly dry them before adding to fresh salads or grain bowls where excess moisture would dilute dressings.
Quick Pickled Radishes for Tacos

Quick pickled radishes are a classic topping for Mexican street tacos and tortas, delivering a crisp, invigorating crunch and bright acidity that cuts through rich meats and creamy toppings. These vibrant pink and white slices transform ordinary radishes into a tangy, slightly sweet condiment that adds both textural contrast and visual appeal to any taco spread.
The natural peppery bite of fresh radishes mellows considerably during the pickling process, becoming pleasantly sharp rather than harsh, while maintaining their signature satisfying crunch. Unlike softer pickled vegetables, radishes hold their firm texture exceptionally well, making them ideal for tacos where that crisp element is essential to the overall eating experience.
This simple refrigerator pickle recipe follows the traditional Mexican approach, using a straightforward vinegar-based brine seasoned with just enough aromatics to enhance rather than overpower the radishes’ natural flavor. The pickling liquid turns a beautiful pale pink from the radish skins, creating an attractive brine that looks as good as it tastes.
Ready to eat in as little as one hour, these pickled radishes improve over the first day or two as the flavors meld, and they’ll keep fresh and crisp in the refrigerator for up to two weeks. They’re perfect not just for tacos, but also for topping tostadas, quesadillas, nachos, or adding to Mexican-inspired grain bowls and salads. When preparing these pickles and other Mexican dishes, having premium cookware sets can make the cooking process more efficient and enjoyable.
Ingredients
- 1 bunch radishes (about 12-15 radishes), thinly sliced
- ¾ cup white vinegar
- ¾ cup water
- 2 tablespoons granulated sugar
- 1½ tablespoons kosher salt
- 3 garlic cloves, smashed
- 1 teaspoon black peppercorns
- ½ teaspoon dried oregano (preferably Mexican oregano)
- 2 bay leaves
- ¼ teaspoon red pepper flakes (optional)
Instructions
Place the sliced radishes in a clean pint jar or heat-safe container. In a small saucepan, combine the vinegar, water, sugar, salt, garlic, peppercorns, oregano, bay leaves, and red pepper flakes if using, then bring the mixture to a boil over medium-high heat, stirring until the sugar and salt fully dissolve. Once boiling, immediately pour the hot brine over the radishes, guaranteeing they’re completely covered by the liquid, and gently press down any slices that float to the surface.
Let the jar cool at room temperature uncovered for about 30 minutes, then cover with a tight-fitting lid and refrigerate for at least 1 hour before serving, though the flavor will continue to develop and improve over the next 24 hours.
Tips
For the best results, slice the radishes uniformly thin—about ⅛ inch thick—using a mandoline or sharp knife to guarantee even pickling and consistent texture. If your radishes are particularly large or have a very strong peppery flavor, you can briefly soak the sliced radishes in ice water for 10 minutes before pickling to mellow their bite.
Don’t discard the pretty pink pickling liquid once you’ve finished the radishes; it makes an excellent addition to salad dressings, marinades, or even cocktails. If you prefer a less sweet pickle, you can reduce the sugar to 1 tablespoon without compromising the preservation quality, and for extra Mexican flair, add a few sprigs of fresh cilantro to the jar before pouring in the brine.
Pickled Jalapeños for Mexican Dishes

Pickled jalapeños, or jalapeños en escabeche, are an essential condiment in Mexican cuisine, appearing on tables throughout Mexico and the American Southwest as a standard accompaniment to everything from tacos and tortas to eggs and nachos.
The pickling process transforms fresh jalapeños from intensely spicy peppers into mellower, tangy slices that retain heat but gain complexity through the sweet-sour brine and aromatic vegetables.
The pickling liquid moderates the capsaicin burn just enough to make these peppers more approachable while preserving their characteristic kick, creating a perfect balance between heat, acidity, and subtle sweetness that enhances rather than overwhelms dishes.
These refrigerator pickled jalapeños are quick to prepare and ready to eat within hours, though their flavor deepens and improves after a day or two in the brine.
The addition of sliced carrots and onions—traditional in Mexican pickled jalapeño recipes—adds sweetness, crunch, and visual appeal while creating a more versatile condiment that works across a wider range of dishes.
Unlike many commercial versions that can taste tinny or overly vinegary, homemade pickled jalapeños offer cleaner, brighter flavors with the exact level of heat you prefer, since you control both the pepper quantity and whether to include the spicier seeds and membranes.
Having the right Mexican cooking tools on hand, such as a quality molcajete for grinding spices or a comal for toasting dried chiles, can elevate your entire Mexican cooking experience beyond just making pickled jalapeños.
Ingredients
- 8-10 jalapeño peppers, sliced into ¼-inch rounds
- 1 medium carrot, peeled and sliced into thin rounds
- ½ medium white onion, thinly sliced
- 4 garlic cloves, peeled and smashed
- 1 cup white vinegar
- 1 cup water
- 2 tablespoons granulated sugar
- 1 tablespoon kosher salt
- 1 teaspoon dried oregano (preferably Mexican oregano)
- 1 teaspoon black peppercorns
- 2 bay leaves
- ½ teaspoon cumin seeds
- 3-4 sprigs fresh thyme (optional)
Instructions
Pack the sliced jalapeños, carrots, onions, and garlic into a clean quart jar or heat-safe container, arranging them so they’re evenly distributed.
In a medium saucepan, combine the vinegar, water, sugar, salt, oregano, peppercorns, bay leaves, and cumin seeds, bringing the mixture to a boil over medium-high heat while stirring to dissolve the sugar and salt completely.
Once the brine reaches a rolling boil, remove it from heat and immediately pour it over the vegetables in the jar, adding the thyme sprigs if using, and ensuring all the vegetables are fully submerged beneath the liquid.
Use a clean spoon to press down any floating pieces and release any trapped air bubbles.
Allow the jar to cool uncovered at room temperature for approximately 45 minutes, then seal with a tight-fitting lid and refrigerate for at least 2 hours before serving, though overnight refrigeration yields the best flavor development.
Tips
For milder pickled jalapeños, remove all the seeds and white membranes from the peppers before slicing, as this is where most of the heat resides, or substitute half the jalapeños with mild poblano or Anaheim peppers for a gentler kick.
The carrots will soften slightly more than the peppers during pickling, so slice them slightly thicker if you prefer more crunch, or cut them into matchsticks for faster pickling and easier eating on sandwiches and burgers.
These pickled jalapeños will keep refrigerated for up to one month, and the brine can be reused once by heating it again and pouring over a fresh batch of vegetables, though the flavor will be slightly less intense the second time.
Mexican Pickled Vegetables (Escabeche)

Escabeche, the vibrant Mexican pickle plate featuring a colorful mix of vegetables in spiced vinegar brine, represents the broader tradition of pickling that extends beyond jalapeños alone.
This festive combination typically includes cauliflower, carrots, jalapeños, and onions, though regional variations might incorporate zucchini, green beans, or other seasonal vegetables.
The resulting medley appears on Mexican restaurant tables and home kitchens as both a condiment and a side dish, offering a revitalizing counterpoint to rich, hearty foods like carnitas, barbacoa, and cheesy enchiladas.
The vegetables retain a satisfying crispness even after pickling, providing textural contrast while the tangy, lightly spiced brine cuts through fatty or heavy dishes.
Making your own escabeche allows you to customize the vegetable selection and spice level to your preferences while avoiding the preservatives and excessive sodium often found in jarred versions.
The quick refrigerator method means these pickles develop flavor within hours and reach their peak after a day or two of marinating, when the vegetables have absorbed the aromatic brine while maintaining their fresh texture and bright colors.
Unlike fermented pickles that require days or weeks, this vinegar-based approach delivers immediate gratification with minimal effort, making it an ideal preparation for parties, taco nights, or simply keeping on hand to elevate weeknight meals.
Having premium kitchen appliances like a quality mandoline for uniform vegetable slicing or a large stockpot for blanching can streamline the escabeche-making process considerably.
Ingredients
- 2 cups cauliflower florets, cut into bite-sized pieces
- 2 medium carrots, peeled and sliced diagonally ¼-inch thick
- 3-4 jalapeño peppers, sliced into rounds
- 1 medium white onion, cut into wedges or thick slices
- 4 garlic cloves, peeled and halved
- 1½ cups white vinegar
- 1½ cups water
- 3 tablespoons granulated sugar
- 2 tablespoons kosher salt
- 1 tablespoon dried oregano (preferably Mexican oregano)
- 2 teaspoons black peppercorns
- 3 bay leaves
- 1 teaspoon cumin seeds
- ½ teaspoon coriander seeds
- 4-5 sprigs fresh marjoram or thyme (optional)
- 2-3 dried árbol chiles (optional, for extra heat)
Instructions
Bring a large pot of salted water to a boil and prepare an ice bath in a large bowl.
Blanch the cauliflower and carrots in the boiling water for 2-3 minutes until slightly tender but still crisp, then immediately transfer them to the ice bath to stop the cooking process and preserve their color and crunch.
Drain the blanched vegetables thoroughly and pack them into clean quart jars along with the raw jalapeño slices, onion, and garlic, distributing everything evenly.
In a medium saucepan, combine the vinegar, water, sugar, salt, oregano, peppercorns, bay leaves, cumin seeds, coriander seeds, and árbol chiles if using, bringing the mixture to a rolling boil over medium-high heat while stirring to dissolve the sugar and salt completely.
Pour the hot brine over the vegetables, tucking in the fresh herb sprigs if using, and making sure all vegetables are submerged beneath the liquid.
Let the jar cool to room temperature, then cover tightly and refrigerate for at least 4 hours before serving, though the flavors will develop more fully after 24 hours.
Tips
The blanching step for cauliflower and carrots is essential—it softens them just enough to absorb the brine while preventing the raw, hard texture that would result from pickling them completely raw, but don’t over-blanch or they’ll turn mushy.
Feel free to adjust the vegetable ratios based on your preferences or what you have available, and consider adding other sturdy vegetables like green beans, pearl onions, or sliced zucchini.
These pickles will keep in the refrigerator for up to one month, and the flavor continues to develop over time, becoming more mellow and integrated.
Serve escabeche cold or at room temperature, and don’t discard the brine when the vegetables are gone—it makes an excellent base for salad dressings or marinade for chicken or pork.
Honey-Dill Refrigerator Pickled Carrots

These honey-dill pickled carrots strike an elegant balance between sweet and tangy, with the floral notes of dill complementing the natural earthiness of carrots. Unlike traditional dill pickles that rely solely on vinegar’s sharp acidity, the addition of honey softens the brine’s edges while enhancing the carrots’ inherent sweetness, creating a more nuanced flavor profile.
The result is a sophisticated pickle that works equally well as a cocktail garnish, cheese board accompaniment, or standalone snack. The carrots maintain a satisfying snap even after several days in the brine, making them superior to their canned counterparts in both texture and taste.
This quick refrigerator method transforms humble carrots into something special without requiring any canning equipment or specialized knowledge. The bright orange spears look beautiful packed into clear jars, and their vibrant color intensifies as they absorb the golden-hued brine.
These pickles develop noticeable flavor within just a few hours, though they continue to improve over the first three days as the dill and spices permeate the carrots. They’ll keep refrigerated for up to a month, though they rarely last that long once people discover them tucked in your fridge. Using premium kitchen tools can make the slicing and preparation process more efficient and enjoyable.
Ingredients
- 1 pound carrots, peeled and cut into sticks or coins
- 1 cup white vinegar
- 1 cup water
- ¼ cup honey
- 2 tablespoons kosher salt
- 4-5 sprigs fresh dill
- 4 garlic cloves, peeled and lightly smashed
- 1 teaspoon yellow mustard seeds
- 1 teaspoon black peppercorns
- ½ teaspoon red pepper flakes (optional)
- 2 bay leaves
Instructions
Pack the carrot sticks tightly into a clean quart-sized jar or two pint-sized jars, tucking the dill sprigs and garlic cloves among them.
In a medium saucepan, combine the vinegar, water, honey, salt, mustard seeds, peppercorns, red pepper flakes if using, and bay leaves, then bring to a boil over medium-high heat, stirring to dissolve the honey and salt completely.
Once the brine reaches a full boil, remove it from heat and carefully pour it over the carrots, guaranteeing all vegetables are submerged and leaving about ½ inch of headspace at the top of the jar.
Let the jar cool to room temperature, then seal with a lid and refrigerate for at least 4 hours before serving, though they taste best after marinating overnight.
Tips
For the crispest pickled carrots, choose firm, fresh carrots and avoid older specimens with a rubbery texture, as they won’t improve in the brine.
Cutting carrots into uniform sizes guarantees even pickling, and slicing them on the diagonal creates attractive pieces with more surface area to absorb flavor.
If you prefer softer pickles, briefly blanch the carrots for 1-2 minutes before packing them into jars.
The honey can crystallize when chilled, so shake the jar gently before serving if you notice any separation or cloudiness in the brine.
Fresh dill is essential here—dried dill simply doesn’t provide the same aromatic quality or visual appeal.
Crispy Refrigerator Pickled Cauliflower

Pickled cauliflower transforms this mild cruciferous vegetable into a tangy, crunchy condiment that delivers bold flavor with every bite. The florets’ naturally porous structure allows them to absorb the aromatic brine quickly while maintaining an exceptional crispness that holds up beautifully for weeks in the refrigerator.
Unlike softer vegetables that can turn mushy in acidic brines, cauliflower’s firm texture actually benefits from the pickling process, developing a satisfying snap that makes it irresistible straight from the jar. The neutral flavor canvas of raw cauliflower readily accepts the spices and seasonings in the brine, becoming infused with garlic, turmeric, and aromatic spices that turn each floret a gorgeous golden hue.
This Middle Eastern-inspired pickle brings bright acidity and crunch to everything from grain bowls and salads to mezze platters and sandwiches. The turmeric not only provides an earthy warmth but also gives the cauliflower a vibrant yellow color that makes these pickles as visually appealing as they’re delicious.
Ready to eat in as little as 24 hours, these pickles continue developing deeper, more complex flavors over the course of a week. They’re perfect for using up a whole head of cauliflower, and the recipe easily doubles if you want to keep multiple jars on hand for impromptu snacking or entertaining.
Ingredients
- 1 medium head cauliflower (about 2 pounds), cut into bite-sized florets
- 1½ cups white vinegar
- 1½ cups water
- 2 tablespoons kosher salt
- 2 tablespoons sugar
- 5 garlic cloves, peeled and halved
- 1 tablespoon yellow mustard seeds
- 1 teaspoon ground turmeric
- 1 teaspoon coriander seeds
- 1 teaspoon black peppercorns
- ½ teaspoon cumin seeds
- ¼ teaspoon red pepper flakes
- 2 bay leaves
Instructions
Divide the cauliflower florets between two quart-sized jars or one large half-gallon jar, distributing the garlic cloves evenly among them. In a medium saucepan, combine the vinegar, water, salt, sugar, mustard seeds, turmeric, coriander seeds, peppercorns, cumin seeds, red pepper flakes, and bay leaves, then bring the mixture to a rolling boil over medium-high heat, stirring occasionally until the salt and sugar completely dissolve.
Pour the hot brine over the cauliflower florets, making sure all pieces are fully submerged and using a clean spoon to press down any florets that try to float to the surface. Allow the jars to cool uncovered at room temperature for about an hour, then seal with tight-fitting lids and refrigerate for at least 24 hours before enjoying, shaking or inverting the jars once or twice during the first day to distribute the spices evenly.
Tips
Cutting the cauliflower into uniform-sized florets guarantees even pickling throughout, with pieces between 1 and 1½ inches being ideal for both flavor absorption and ease of eating.
Blanching the cauliflower for 1-2 minutes in boiling water before pickling will soften it slightly if you prefer a less crunchy texture, though this step is entirely optional and not recommended if maximum crispness is your goal.
The turmeric will stain, so use caution when handling the brine and consider wearing gloves if you’re concerned about yellowed fingertips.
These pickles will keep refrigerated for up to 6 weeks, becoming more flavorful and slightly softer over time, though they maintain a pleasant crunch throughout their storage life.
Refrigerator Pickled Green Beans With Dill

Green beans become sensational pickles, developing a crisp texture and bright, herbaceous flavor that makes them utterly addictive.
The slender beans pickle quickly in a vinegar brine laced with fresh dill and garlic, transforming into crunchy spears that deliver the perfect balance of tangy, savory, and slightly sweet notes.
Unlike the overly soft canned dilly beans from the supermarket, these refrigerator pickles maintain a firm snap that makes them ideal for snacking straight from the jar or serving as part of a relish tray.
The combination of dill seed and fresh dill fronds creates layers of herbaceous flavor that complement the natural vegetal sweetness of the beans.
These pickled green beans are incredibly versatile, working equally well as a cocktail garnish for Bloody Marys, a crisp addition to charcuterie boards, or a bright accompaniment to rich, savory dishes.
The pickling brine seasons the beans throughout while keeping them crisp and fresh-tasting, developing the best flavor after two to three days in the refrigerator.
They’ll keep for up to a month when properly stored, though they rarely last that long once you start snacking on them.
This recipe is an excellent way to preserve a bumper crop of fresh green beans from the garden or farmers market, capturing their peak-season flavor in a shelf-stable form.
Ingredients
- 1 pound fresh green beans, trimmed
- 1½ cups white vinegar
- 1½ cups water
- 2 tablespoons kosher salt
- 1 tablespoon sugar
- 6 garlic cloves, peeled and smashed
- 4 large sprigs fresh dill
- 2 teaspoons dill seeds
- 1 teaspoon black peppercorns
- 1 teaspoon yellow mustard seeds
- ½ teaspoon red pepper flakes
- 2 bay leaves
Instructions
Pack the trimmed green beans vertically into two wide-mouth pint jars or one quart jar, fitting them in snugly so they stand upright, then tuck the fresh dill sprigs and smashed garlic cloves around the beans.
In a medium saucepan, combine the vinegar, water, salt, sugar, dill seeds, peppercorns, mustard seeds, red pepper flakes, and bay leaves, bringing the mixture to a boil over medium-high heat while stirring to dissolve the salt and sugar completely.
Pour the hot brine over the green beans, ensuring they’re completely covered and leaving about half an inch of headspace at the top of each jar.
Let the jars cool to room temperature uncovered for about an hour, then seal with lids and refrigerate for at least 24 hours before eating, though they’ll taste even better after 48 to 72 hours once the flavors fully develop.
Tips
For the crispest pickled beans, choose the freshest, firmest green beans you can find, avoiding any that feel limp or show signs of shriveling.
French-style haricots verts work beautifully in this recipe, though standard green beans are equally delicious.
If your beans are too long to fit vertically in the jars, you can trim them to size or cut them in half, though whole beans make a more dramatic presentation.
The garlic will mellow considerably as it pickles, developing a sweet, tangy flavor that makes the cloves themselves worth eating alongside the beans.
Quick Pickled Beets With Warm Spices

Beets transform into jewel-toned delicacies when quick-pickled with aromatic warm spices, developing a complex flavor profile that balances earthy sweetness with bright acidity and subtle warmth.
The natural sugars in the beets caramelize slightly during cooking before being bathed in a spiced vinegar brine infused with cinnamon, cloves, and star anise, creating a sophisticated pickle that’s miles away from the overly sweet, one-dimensional canned beets found in grocery stores.
The warm spices complement rather than overwhelm the beets’ inherent earthiness, while the pickling process tames any muddy flavors and highlights their natural sweetness.
These pickled beets develop a tender yet firm texture that holds up beautifully on salads, cheese plates, or served alongside rich meats.
The vibrant magenta brine is nearly as valuable as the beets themselves, offering a beautifully colored, flavor-packed liquid that can be used to pickle hard-boiled eggs, drizzle over roasted vegetables, or add tang to vinaigrettes.
Both golden and red beets work wonderfully in this recipe, though it’s best to pickle them separately to prevent color bleeding if using golden varieties.
The beets reach peak flavor after three to four days in the refrigerator and will keep for up to six weeks, becoming more deeply flavored as they sit.
This recipe works equally well with farmers market beets or standard supermarket bunches, making it an accessible way to enjoy this often-underappreciated root vegetable year-round.
Investing in premium kitchen gadgets like quality mandolines or sharp peeling knives can make preparing and slicing beets significantly easier and safer.
Sweet Pickled Cherry Tomatoes

Cherry tomatoes become candy-like gems when preserved in a sweet-tart brine, transforming their fresh garden flavor into something more concentrated and complex while maintaining their satisfying pop.
Unlike larger tomatoes that can become mushy when pickled, cherry tomatoes hold their shape beautifully, their skins protecting the tender flesh inside from breaking down too much in the acidic brine.
The pickling liquid penetrates through small slits cut into each tomato, infusing them with sweetness, tang, and aromatics without compromising their structural integrity.
These pickled tomatoes offer a burst of bright, vinegary sweetness that makes them irresistible straight from the jar, but they also shine as additions to grain bowls, pasta salads, antipasto platters, or alongside grilled meats and fish.
The natural sweetness of ripe cherry tomatoes means they require less sugar than many pickle recipes, allowing the tomatoes’ inherent flavor to remain front and center while the brine adds complexity rather than overwhelming sugariness.
A combination of white wine vinegar and a touch of honey creates a more nuanced sweetness than granulated sugar alone, while garlic, fresh basil, and red pepper flakes add savory depth and a gentle heat that balances the sweetness.
These pickles are best made at the height of summer when cherry tomatoes are abundant and inexpensive at farmers markets, though good-quality supermarket cherry or grape tomatoes work well year-round.
The tomatoes are ready to eat within 24 hours but develop deeper flavor after three days, lasting up to three weeks in the refrigerator.
Ingredients
- 2 pints cherry or grape tomatoes
- 1 cup white wine vinegar
- ½ cup water
- ¼ cup honey
- 2 tablespoons sugar
- 1 tablespoon kosher salt
- 4 garlic cloves, smashed and peeled
- 1 teaspoon red pepper flakes
- 1 teaspoon mustard seeds
- ½ teaspoon black peppercorns
- 6-8 fresh basil leaves
- 2 fresh thyme sprigs
Instructions
Using a sharp paring knife, cut a small X into the bottom of each cherry tomato, being careful not to cut too deeply—just pierce the skin to allow the brine to penetrate.
Pack the tomatoes into two wide-mouth pint jars along with the garlic cloves and fresh herbs, distributing evenly.
In a medium saucepan, combine the vinegar, water, honey, sugar, salt, red pepper flakes, mustard seeds, and peppercorns, bringing the mixture to a boil over medium-high heat while stirring to dissolve the honey and sugar completely.
Once the brine reaches a full boil, immediately pour it over the tomatoes in the jars, ensuring all tomatoes are completely submerged and leaving about half an inch of headspace at the top.
Let the jars cool to room temperature uncovered, then seal with lids and refrigerate.
The small X cut into each tomato is essential for allowing the brine to season the interior while preventing the tomatoes from bursting from the heat of the liquid.
If your tomatoes are particularly small, you can leave some whole and simply prick them several times with a toothpick instead of cutting Xs.
The basil will darken in the brine but will continue to infuse the tomatoes with its flavor, so don’t be alarmed by the color change.
For a more intense garlic flavor, slice the garlic cloves instead of leaving them whole.
These pickled tomatoes work beautifully in martinis as a substitute for olives, and the leftover brine makes an excellent base for salad dressings or can be used to quick-pickle thinly sliced cucumbers or red onions.
Italian Refrigerator Pickled Peppers and Onions

Bell peppers and onions become a vibrant, tangy condiment when quick-pickled Italian-style, creating the perfect topping for sandwiches, sausages, and grilled meats while also serving as an essential component of antipasto spreads. This colorful combination captures the essence of Italian-American cuisine, where sweet peppers and onions are traditionally slow-cooked together, but the refrigerator pickling method preserves their crisp texture and bright flavor while infusing them with aromatic herbs and a balanced sweet-tart brine.
The peppers maintain their snappy crunch and the onions soften just slightly, creating a textural contrast that makes them endlessly versatile in the kitchen. These pickles are inspired by the classic Italian giardiniera but focus specifically on the pepper-onion combination that’s become iconic on Chicago-style Italian beef sandwiches and Philly cheesesteaks.
The key to exceptional pickled peppers and onions lies in selecting a rainbow of bell peppers—red, yellow, and orange varieties offer natural sweetness that balances the acidity of the brine, while their different colors create visual appeal in the jar. Red wine vinegar provides a more robust, wine-forward acidity than white vinegar, complementing the peppers’ sweetness and creating a more authentically Italian flavor profile.
Dried oregano, fresh garlic, and a pinch of sugar round out the brine, while a small amount of olive oil added to the finished pickles helps them taste richer and more integrated. These pickles require minimal preparation time and are ready to eat within a day, though they continue developing flavor for up to a week and keep beautifully for a month in the refrigerator.
Ingredients
- 3 large bell peppers (mix of red, yellow, and orange), cut into ½-inch strips
- 1 large red onion, halved and thinly sliced
- 1 cup red wine vinegar
- ½ cup water
- 2 tablespoons sugar
- 1 tablespoon kosher salt
- 4 garlic cloves, thinly sliced
- 1 tablespoon dried oregano
- 1 teaspoon black peppercorns
- ½ teaspoon red pepper flakes
- 2 bay leaves
- 2 tablespoons extra-virgin olive oil
Instructions
Pack the sliced peppers and onions into two wide-mouth pint jars or one quart jar, layering them with the sliced garlic and tucking in the bay leaves along the sides where they’ll be visible. In a medium saucepan, combine the red wine vinegar, water, sugar, salt, oregano, peppercorns, and red pepper flakes, bringing the mixture to a boil over medium-high heat while stirring to dissolve the sugar and salt completely.
Once boiling, remove from heat and immediately pour the hot brine over the peppers and onions, ensuring all the vegetables are completely submerged and leaving about ½ inch of headspace at the top. Gently tap the jars on the counter to release any air bubbles, then drizzle 1 tablespoon of olive oil over the top of each pint jar (or 2 tablespoons for a quart jar).
Let the jars cool to room temperature uncovered for about an hour, then seal with lids and refrigerate for at least 24 hours before serving, though they’re even better after 3 days.
Tips
For the best texture, slice the peppers and onions uniformly so they pickle at the same rate, and avoid cutting them too thin or they’ll become overly soft and lose their satisfying crunch.
If you prefer spicier pickles, add a sliced fresh jalapeño or serrano pepper to the jar, or increase the red pepper flakes to 1 teaspoon.
The olive oil added at the end isn’t traditional for all pickles but is essential here—it creates a silky coating on the vegetables and helps marry the flavors together while preventing the pickles from tasting too sharply acidic.
When serving, use a clean fork to remove pickles from the jar to prevent contamination and extend their refrigerator life, and consider spooning some of the flavorful brine over sandwiches or using it as a vinaigrette base for salads.
Ginger-Sesame Refrigerator Pickled Daikon

Daikon radish transforms into a crisp, invigorating pickle with distinctive Asian flavors when combined with ginger, sesame, and rice vinegar, creating a condiment that brightens rice bowls, complements rich meats, and adds essential crunch to banh mi sandwiches and Korean-inspired dishes.
This Japanese and Korean-influenced pickle draws on the tradition of tsukemono and Korean danmuji, but simplified for the home refrigerator rather than requiring fermentation or elaborate preparation.
The daikon’s mild, slightly peppery flavor and dense, juicy texture make it ideal for pickling—it absorbs the brine beautifully while maintaining a satisfying snap that holds up for weeks.
Unlike some pickles that become limp over time, daikon actually improves as it sits, developing deeper flavor while retaining its characteristic crunch.
The pickling brine features rice vinegar, which provides a gentler, more delicate acidity than distilled or wine vinegars, allowing the fresh ginger and toasted sesame oil to shine through without overwhelming the daikon’s subtle sweetness.
Fresh ginger adds warming spice and aromatic complexity, while a touch of sugar balances the acidity and enhances the daikon’s natural sweetness.
Toasted sesame oil stirred in at the end creates a nutty richness that makes these pickles taste restaurant-quality, and optional additions like soy sauce or a pinch of turmeric can deepen the color and add umami complexity.
These pickles are ready to eat within 24 hours and will keep for up to six weeks refrigerated, becoming more flavorful and slightly softer as they age.
Ingredients
- 1 large daikon radish (about 1½ pounds), peeled and cut into ¼-inch-thick half-moons or matchsticks
- 1 cup unseasoned rice vinegar
- ½ cup water
- 3 tablespoons sugar
- 1 tablespoon kosher salt
- 2-inch piece fresh ginger, peeled and cut into thin matchsticks
- 2 teaspoons toasted sesame oil
- 1 teaspoon sesame seeds (white or black)
- 2 garlic cloves, thinly sliced
- ½ teaspoon red pepper flakes (optional)
Instructions
Pack the daikon pieces into two wide-mouth pint jars or one quart jar, distributing the ginger matchsticks and sliced garlic evenly throughout.
In a medium saucepan, combine the rice vinegar, water, sugar, and salt, then bring to a boil over medium-high heat, stirring until the sugar and salt completely dissolve.
Remove from heat and let the brine cool for about 5 minutes, then stir in the toasted sesame oil, sesame seeds, and red pepper flakes if using.
Pour the warm brine over the packed daikon, ensuring all pieces are submerged and leaving about ½ inch of headspace at the top.
Let the jars cool to room temperature uncovered, then seal with lids and refrigerate for at least 24 hours before serving, shaking or inverting the jars occasionally to redistribute the sesame oil and seasonings.
Tips
For the best texture, cut the daikon into uniform pieces so they pickle evenly, and avoid cutting them too thin or they’ll become overly soft.
If you prefer a sweeter pickle similar to the bright yellow takuan served at sushi restaurants, increase the sugar to ¼ cup and add ¼ teaspoon of turmeric for color.
The sesame oil will separate and float to the top, which is normal—just shake the jar gently before serving to redistribute it.
These pickles pair exceptionally well with fatty foods like pork belly, ramen, or fried chicken, as their acidity and crunch cut through richness, and they can be chopped and stirred into grain bowls, used as a garnish for dumplings, or served alongside grilled fish for an invigorating contrast.
Frequently Asked Questions
How Long Do Refrigerator Pickles Last in the Fridge?
Your refrigerator pickles will last up to two months when you store them properly in an airtight container. You’ll get the best flavor and crunch during the first month, so enjoy them while they’re fresh.
Can I Reuse the Brine for Another Batch of Pickles?
Don’t put all your eggs in one basket—you shouldn’t reuse pickle brine for another batch. The brine loses acidity and flavor after the first use, making it unsafe and ineffective for properly preserving fresh vegetables.
What Type of Vinegar Works Best for Refrigerator Pickles?
White distilled vinegar works best for refrigerator pickles because it’s clear and won’t discolor your vegetables. You can also use apple cider vinegar for a milder, slightly sweeter flavor that complements cucumbers beautifully.
Do Refrigerator Pickles Need to Be Sterilized Before Use?
No, you don’t need to sterilize jars for refrigerator pickles. You’ll simply wash them in hot, soapy water or run them through your dishwasher. The vinegar brine and refrigeration prevent bacterial growth naturally.
Can I Use Iodized Salt Instead of Pickling Salt?
You can use iodized salt, but it’s not recommended. The iodine and anti-caking agents may cause cloudiness and discoloration in your pickles. Pickling salt produces clearer, better-looking results for refrigerator pickles.


