


Garlic planted in fall actually grows stronger roots over winter, and that head start leads to bigger bulbs come summer. You don’t need a large garden or special skills to make it work. This guide walks you through every step, from picking the right type to harvesting at the perfect moment, so you can get the most from each clove you plant.
Key Takeaways
- Choose certified seed garlic with large, plump cloves; hardneck varieties like ‘German White’ suit cold-climate gardens best.
- Prepare well-drained, full-sun soil by loosening 8–12 inches deep and incorporating 2–4 inches of aged compost.
- Plant cloves pointy-end up, 2–4 inches deep and 4–6 inches apart, from mid-September through November.
- Mulch beds with 3–6 inches of straw or shredded leaves to insulate roots and suppress winter weeds.
- Remove hardneck scapes once fully curled and stop watering 2–3 weeks before harvest for the largest bulbs.
Hardneck vs. Softneck: Which Garlic Should You Grow?

Before you buy your first bulb, you’ll want to decide between two main types of garlic: hardneck and softneck.
Before selecting your first garlic bulb, you’ll need to choose between the two primary varieties: hardneck or softneck.
Hard-neck garlic needs a cold winter period called vernalization, and it grows best in Zones 1–6. It produces large, flavorful cloves and edible garlic scapes, but its storage life is shorter at just 2–5 months.
Softneck garlic skips the cold requirement and thrives in warmer Zones 8–12. It stores much longer, up to 12 months, and works great for braiding.
If you garden in the Midwest, hardneck varieties like ‘German White’ or ‘Music’ are excellent choices.
Always buy seed garlic from reputable suppliers, since grocery-store garlic is often treated to prevent sprouting.
Use regional planting calendars to guide your variety choice and ensure your selected type aligns with your local climate zone for the best results.
Recommended Products

Large, Firm Garlic Cloves for Planting. Each bulb produces thick, well-formed garlic cloves that separate cleanly. Customers consistently mention the firm texture and size, making these garlic seeds for planting easy to handle and space evenly.

A great tasting healthy. Heirloom, Non-GMO
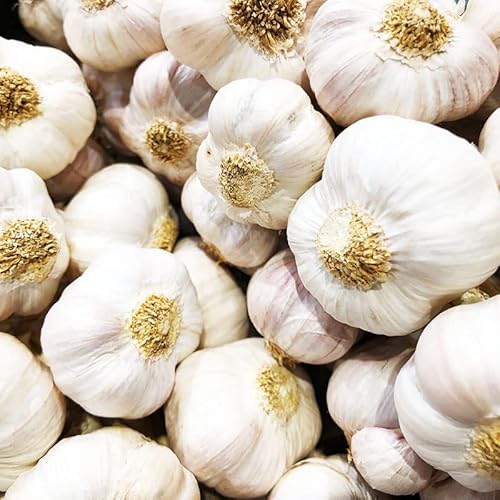
Bold, Rich Flavor: Known for their robust, spicy taste that intensifies when cooked—perfect for roasting, sautés, and garlic-infused oils.
Choose Seed Garlic, Not Grocery Store Bulbs

Skip the grocery store garlic and head to a reputable seed supplier instead. Grocery store garlic is often treated with sprout inhibitors, so it won’t grow well in your garden. It may also carry diseases that can harm your soil for years. Certified seed garlic comes from disease-free bulbs that are bred and tested specifically for planting.
Order your seed garlic early, ideally by August, to secure popular varieties before they sell out. Choose only the largest, plumpest cloves from each head, and leave the papery skins on. Once you’ve had a successful harvest, save seed stock from your best bulbs each year.
Over time, your saved garlic will adapt to your specific soil and climate, giving you even bigger harvests. Before planting, perform a quick soil pH test to ensure your garden bed offers the right conditions for strong root development and healthy bulb formation.
Recommended Products

Hardneck Garlic Bulbs for planting grow into flavorful homegrown garlic with firm bulbs, large individual cloves and distinctive curling scapes, making them an excellent choice for vegetable gardens, raised beds and kitchen gardens


Great for Culinary Use in the Kitchen and for Planting and Growing Garlic
Prep Your Soil Before You Plant

Once you’ve got your seed garlic sorted, it’s time to get your garden bed ready. Start by choosing a spot with well-drained soil and full sun, then work in 2–4 inches of well-aged compost to improve fertility and structure.
Next, loosen top 8–12 inches of soil so roots can spread easily and develop strong bulbs. Test your soil pH and aim for 6.0–7.0, adding lime to raise it or sulfur to lower it, because garlic needs balanced soil to absorb nutrients properly.
Remove perennial weeds and clear away any debris, then rake the surface smooth so every clove sits at a consistent depth. For the richest compost to work into your bed, build your pile to a minimum 3×3×3-foot volume and maintain internal temperatures between 110–140°F to ensure thorough decomposition before application. Good prep now means bigger, healthier bulbs later.
How to Plant Garlic Cloves the Right Way

Grab your seed garlic and break each head into individual cloves just before you plant them. Keep the papery skin on each clove, and toss any that feel soft or look moldy. Always plant cloves up, pointy end toward the sky, so they grow in the right direction.
| Detail | Standard Zones | Cold-Winter Zones |
|---|---|---|
| Depth | 2–3 inches | 4 inches deep |
| Spacing | 4–6 inches apart | 4–6 inches apart |
| Row Distance | 12 inches | 12 inches |
| Fall Planting | Mid-September–November | Mid-September–October |
| Winter Cover | Mulch with straw 3–6 inches | Mulch with straw 6 inches |
Water well after planting, and keep the soil moist until the ground freezes. Like other garden crops that need a strong start, garlic benefits from soil pH between 6.5 and 7.0 to support healthy root development and nutrient uptake. You’re setting your garlic up for a great harvest!
Mulch Your Garlic Bed Before Winter Hits

Now that your cloves are snug in the ground, it’s time to tuck them in for winter. A good mulch layer protects your garlic all season long.
Here’s what to do:
- Spread 3–6 inches of straw or shredded leaves over your bed to insulate the soil evenly.
- Apply mulch in October–November, timing it by your zone so roots stay protected before deep cold arrives.
- Choose breathable straw like EZ Straw, since it lets moisture move through and breaks down naturally by spring.
- Keep the mulch in place all winter, then thin it when green shoots appear so soil can warm up.
- Water well until the ground freezes, because mulch conserves moisture but won’t replace irrigation during dry spells.
Mulch also prevents damaging freeze–thaw cycles from pushing cloves out of the soil. For even more consistent moisture and temperature control throughout the season, consider pairing your mulch routine with drip irrigation installation to deliver water directly to the root zone without disturbing your mulch layer.
Water, Feed, and Scape: Caring for Garlic Through the Season

With your garlic tucked under its mulch, the real growing work begins. Keep newly planted cloves evenly moist until the ground freezes, so roots develop strong before winter. Reduce watering once spring shoots appear, and only water during dry spells to avoid rot.
In early spring, side-dress with well-aged compost to feed your plants without overdoing nitrogen. Avoid heavy feeding once scapes appear, since too much nitrogen grows leaves instead of bulbs. Remove hardneck scapes as soon as they curl into a full loop, and redirect that energy straight into bigger bulbs.
Stop regular irrigation two to three weeks before harvest when lower leaves brown. Then cure harvested bulbs in a warm, ventilated spot for two to four weeks until skins turn papery. When watering is necessary, use drip irrigation with mulch to deliver moisture directly to the root zone while minimizing evaporation and reducing the risk of fungal disease on foliage.
How to Know When Garlic Is Ready to Harvest?

Knowing when to harvest is the most exciting part of growing garlic. Watch your plant’s leaves carefully, and you’ll know exactly when to dig.
Watching your garlic leaves is the secret to knowing exactly when it’s time to dig.
Harvest garlic when half to two-thirds of the lower leaves have dried and turned brown, but the top leaves stay green.
Here’s what to look for:
- Half to two-thirds of lower leaves have dried and browned
- Top leaves remain green and upright
- Bulbs show a firm, papery skin on the outside
- Distinct cloves hold together without a soft neck
- Stems feel sturdy, not mushy
Always test maturity by gently digging one bulb first. Don’t wait until most leaves have dried, or bulbs may split and store poorly.
Harvest on a dry day for best results.
Frequently Asked Questions
How to Plant Garlic in October?
Plant hardneck cloves pointy-side up, 2–4 inches deep and 4–6 inches apart in full sun. Work in compost first, then mulch with 4–6 inches of straw to protect them over winter.
How Much Money Can You Make off One Acre of Garlic?
At $4/lb with 8,000 lbs, you’d gross $32,000 per acre. Subtract $10,000 in costs, and you’re pocketing roughly $22,000 profit—or markedly more if you sell retail or add value.
What Can You Plant Next to Garlic in the Fall?
You can plant winter rye, clover, or companion herbs like chives and parsley next to garlic. Leave 4–6 inches between rows, and avoid deep-rooted brassicas that’ll compete for nutrients come spring.
What Happens if I Plant My Garlic Too Early in the Fall?
Like a runner who sprints too soon, your garlic burns out early. You’ll trigger lush top growth before winter, leaving roots underdeveloped, bulbs smaller, and plants vulnerable to frost damage and heaving next season.
Conclusion
Think of Sarah, who planted her first garlic bed last October with just twelve cloves. By July, she’d harvested a full basket of beautiful bulbs. You can do the same. Follow these steps, and you’ll go from bare soil in fall to a rewarding harvest next summer. Plant your cloves now, and you’re already on your way.


