

You’ll build raised bed garden boxes by cutting untreated dimensional lumber (three 2x6x12′ boards, two 2x6x10′ boards) into 36-inch rails and assembling them with galvanized fasteners to create controlled soil environments. Position longitudinal rails 33 inches apart, secure transverse supports at corners, and reinforce with vertical posts to prevent substrate pressure deformation. Fill with stratified growing media: 40% composted organic matter, 30% sphagnum peat, 20% perlite, and 10% vermicompost for ideal rhizosphere development. This all-encompassing guide reveals advanced techniques for maximizing your raised bed system’s productivity.
Key Takeaways
- Plan bed dimensions at 3 feet wide and 6 feet long with 12-18 inch depth based on crop rooting requirements.
- Use untreated cedar lumber including three 2x6x12-foot boards, two 2x6x10-foot boards, and five 2x4x8-foot boards for construction.
- Assemble by positioning longitudinal rails 33 inches apart, fastening corners with galvanized screws, and securing vertical corner supports.
- Fill beds with 40% compost, 30% peat, 20% perlite or vermiculite, and 10% vermicompost for optimal soil structure.
- Space beds 24-36 inches apart for wheelbarrow access and install drip irrigation for efficient water management.
Why Raised Bed Gardening Makes Sense for Your Home
When soil conditions prove suboptimal—whether you’re contending with heavy clay that restricts *Solanum lycopersicum* root penetration or sandy substrates with poor cation exchange capacity—raised bed systems offer immediate remediation.
You’ll establish controlled edaphic environments where you can optimize pH levels, nutrient availability, and organic matter content. This benefits overview extends beyond soil chemistry: elevated planting surfaces eliminate compaction issues while promoting superior drainage and aeration.
For gardening accessibility, you’re reducing physical strain through ergonomic design that minimizes bending. You’ll also achieve earlier spring warming of soil profiles, extending your growing season considerably while managing weed pressure more efficiently. Metal raised beds provide durability and longevity, making them an excellent investment for gardeners seeking to elevate their growing systems.
Saving Money With DIY Construction

Commercial raised bed kits typically cost $150–$400 per unit, pricing that escalates rapidly when you’re establishing multiple beds for crop rotation or polyculture systems.
Budget friendly options using dimensional lumber reduce expenses to $40–$80 per 18-square-foot bed while maintaining structural integrity for deep-rooted Solanaceae cultivars.
DIY tips include selecting untreated lumber to prevent copper-based preservative leaching into rhizosphere environments, affecting mycorrhizal colonization rates.
Standard 2×6 and 2×4 boards provide sufficient depth for ideal soil stratification and drainage while supporting organic matter decomposition.
This approach maximizes garden expansion capacity without compromising substrate quality or long-term sustainability.
For those seeking premium alternatives, cedar raised garden kits offer superior durability and natural resistance to decay without chemical treatments.
Recommended Products
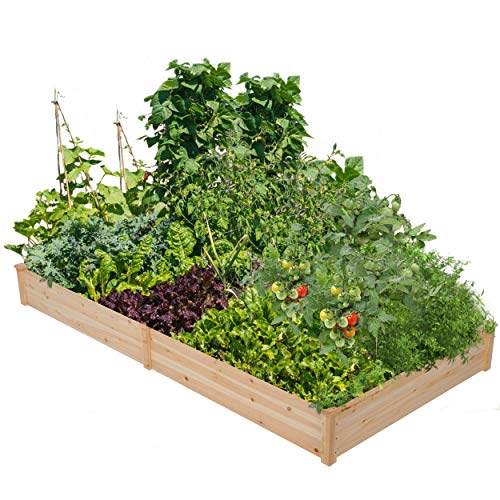
Durable Wooden Construction: Made from solid wood without paint for long-lasting use.

Large Size and Wood Combination: MIXC raised garden beds is made of untreated fir wood, which resists warping and splitting over time better than cedar. The support part is made of Pinus radiata with better load-bearing properties. Dimension: 48”(L) X 24.4”(W) X 31”(H). With 5-6 cubic feet of space and a 9-inch depth, our garden bed offers generous room for your plants flowers and vegetables to breathe and thrive outdoors
Specialized in Garden Bed: Size:10x2x1ft.Ideal choice for your gardens,yards and patio to grow vegetables,flowers,fruits and other plants.
Planning Your Raised Bed Dimensions and Layout

Before selecting dimensional lumber, determine ideal bed dimensions by analyzing your target crops’ rooting depths and spatial requirements.
Solanaceous species like heirloom tomatoes require 18-inch soil depth for extensive root development, while shallow-rooted brassicas thrive in 12 inches.
The 3-foot width guarantees you’ll reach centerline plantings without soil compaction from foot traffic.
Consider raised bed shapes aligned with sun exposure patterns and existing hardscape.
Calculate best spacing between multiple beds—minimum 24 inches for wheelbarrow access, 36 inches for comfortable harvesting.
Standard 6-foot lengths utilize dimensional lumber efficiently while accommodating crop rotation schemes and succession planting intervals.
For gardeners seeking to optimize germination rates before transplanting into raised beds, automatic seed starters can provide consistent moisture and temperature control during the seedling stage.
Recommended Products

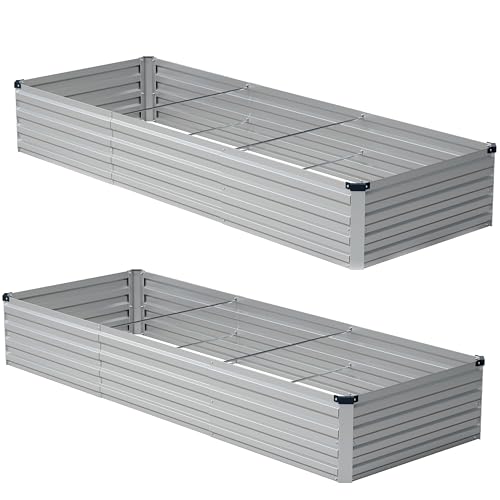
Raised Garden Bed - Add a new level of convenience to your gardening experience with the Galvanized Raised Garden Bed. Enjoy expanded yield and a more assembled garden layout with this garden accessory, each sized at 180 cm X 60 cm x 30 cm.

Pack of 02 Raised Garden Bed - Add a new level of convenience to your gardening experience with the lightweight Galvanized Raised Garden Bed. Enjoy expanded yield and a more assembled garden layout with this garden accessory, each sized at 180 cm X 60 cm x 30 cm.
Each raised metal garden bed size: 6×3×1ft ,15.55Cu
Gathering Your Materials and Tools

Standard dimensional lumber specifications for this project include three 2x6x12-foot boards, two 2x6x10-foot boards, and five 2x4x8-foot boards—sufficient material for constructing one 18-inch-deep growing chamber.
Material selection considerations:
- Untreated lumber: prevents leaching of copper-based preservatives into rhizosphere zones
- Cedar heartwood: natural rot-resistance through thujaplicin compounds
- Rough-sawn hardwoods: enhanced durability in moisture-saturated conditions
- Galvanized fasteners: corrosion-resistant hardware for structural integrity
Tool essentials comprise precision measuring instruments, variable-speed drill-driver assemblies, portable circular saws, and drilling apparatus.
Quality implementation equipment guarantees proper joinery alignment and substrate containment optimization.
For permanent garden structures, consider investing in a metal garden shed to store your tools and materials between growing seasons.
Recommended Products

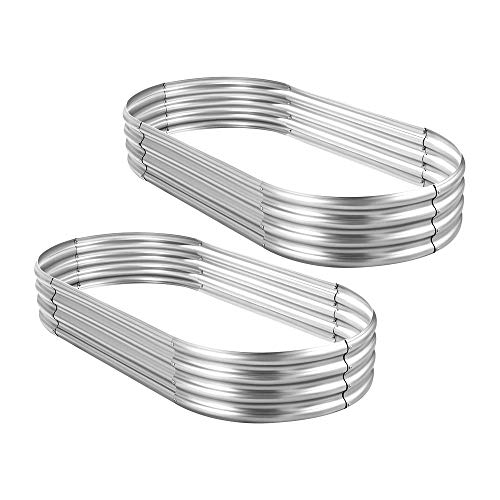
✔ UNIQUE REINFORCED DESIGN – Unlike ordinary flat-panel beds, our raised garden bed features overlapping joints + extra support bars for superior strength. Holds soil firmly, resists bending, and stays stable season after season.

What You Get: we have included Galvanized raised garden bed kit with detailed assembly instructions, rubber edge strips, safety gloves , wrench tools and with galvanized nuts and bolts in the box .These essential tools elevate your overall planting and gardening adventure.
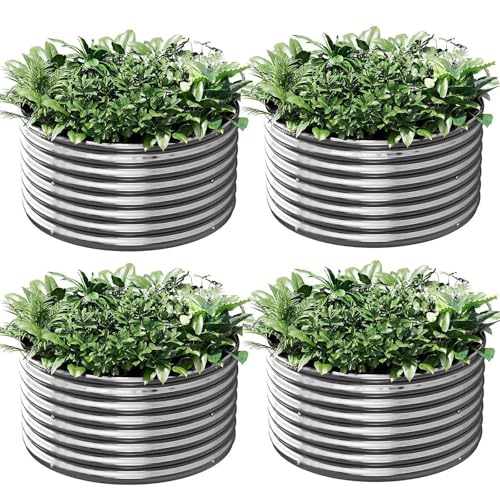
Durable planter box: The round galvanized raised garden bed allow to expose to sun, rain, snow and so on for a long time.
Cutting Your Lumber to Size

Transform your dimensional lumber into precision-cut components by executing accurate measurements before each kerf.
You’ll need (6) 2×6 sections at 36 inches for longitudinal rails, (4) 2×6 pieces at 33 inches for transverse supports, and (4) 2×4 uprights at 18 inches.
Mark measurements using a carpenter’s square to guarantee perpendicular cuts. When employing cutting techniques, secure lumber firmly and maintain proper blade depth.
Precision starts with proper marking—use a carpenter’s square for perpendicular cuts and secure your lumber before cutting to ensure clean, accurate results.
Lumber safety requires eye protection, hearing protection, and stable footing throughout operations.
Cross-cut untreated boards to prevent soil contamination from pressure-treated chemicals that affect rhizosphere development and beneficial microbial populations in your growing medium.
For turning soil and maintaining your raised beds, consider using forged steel garden forks to ensure durability and optimal garden performance.
Step-by-Step Assembly Instructions

Begin construction by positioning two 36-inch longitudinal rails parallel on a level substrate, spacing them precisely 33 inches apart to accommodate transverse supports.
This step by step guide guarantees ideal structural integrity:
- Fasten transverse 2×6 members using galvanized screws at each corner joint.
- Stack secondary tier while maintaining vertical alignment for root zone depth.
- Secure 2×4 vertical supports at corners to prevent soil pressure deformation.
- Install decorative cap rails using assembly tips that guarantee proper drainage.
Orient grain direction outward to minimize moisture infiltration.
Your rhizosphere volume now accommodates Solanum lycopersicum cultivars requiring extensive root development in loamy, well-draining growing medium. A raised bed irrigation kit optimizes water delivery while maintaining consistent soil moisture for optimal plant performance.
Adding Finishing Touches and Treatments

Upon completing structural assembly, protect your investment by applying appropriate wood preservatives that won’t leach phytotoxic compounds into the rhizosphere.
Select certified organic linseed oil or beeswax-based finishing touches rather than synthetic sealants containing copper naphthenate or pentachlorophenol derivatives. These wood treatments safeguard against Basidiomycetes decomposition while maintaining soil chemistry suitable for Solanum lycopersicum cultivation.
Alternatively, allow untreated lumber’s natural lignin degradation to occur, creating beneficial habitat for saprophytic organisms. You’ll enhance substrate moisture retention and cation exchange capacity by applying biochar-enriched stains.
Let treatments cure seventy-two hours before introducing growing media to prevent volatile organic compound interference with mycorrhizal colonization.
Consider storing your soil amendments and garden tools in a patio storage cabinet to keep your gardening supplies organized and protected from the elements.
Filling Your Beds and Getting Ready to Plant

- Combine 40% composted organic matter with verified C:N ratios.
- Incorporate 30% sphagnum peat for moisture retention.
- Add 20% perlite or vermiculite for aeration.
- Mix 10% mature vermicompost for nutrient density.
Strategic planting strategies include evaluating rhizosphere depth requirements for target species.
Heirloom cultivars demand superior drainage; amend accordingly before transplanting.
Consider supplementing your raised beds with rainwater harvesting kits to optimize water efficiency and reduce reliance on municipal sources.
Frequently Asked Questions
How Long Will Untreated Lumber Raised Beds Last Before Needing Replacement?
You’ll get 3-5 years of lumber lifespan from untreated softwoods before decomposition requires replacement. Soil moisture, microbial activity, and pH levels accelerate degradation. Regular garden maintenance monitoring helps you anticipate structural failure timing effectively.
Can I Move My Raised Bed After It’s Filled With Soil?
Unfortunately, raised bed relocation becomes impractical once filled. You’ll face substantial soil weight—approximately 1,800 pounds per bed at field capacity. The saturated substrate’s bulk density and moisture content make post-installation movement nearly impossible without complete emptying.
What Type of Soil Mix Works Best for Raised Bed Gardens?
You’ll want a well-balanced soil composition combining equal parts topsoil, compost, and peat moss or coco coir. Incorporate organic amendments like aged manure, worm castings, and perlite to enhance drainage, nutrient availability, and microbial activity.
Do I Need to Add Drainage Holes to the Raised Bed?
Unlike containers acting as water prisons, you don’t need drainage holes in ground-level raised beds. Natural percolation through the soil profile regulates soil moisture effectively. Bottom-up drainage methods allow excess water to escape into underlying substrate naturally.
How Many Plants Can I Grow in an 18 Square Foot Bed?
Plant capacity depends on your crop’s spacing requirements. You’ll fit 4-6 tomatoes at 24-inch centers, or 18-36 smaller vegetables. Consider species-specific needs and implement crop rotation annually to maintain soil nutrient balance and pH levels.
Conclusion
You’ve engineered structurally sound containers with ideal depth for taproot development and microbial colonization. You’ve mastered corner joints and drainage considerations. Here’s the irony: after all this carpentry precision, you’ll fill these boxes with decomposing organic matter, introduce billions of unseen organisms, and surrender control to rhizosphere dynamics you can’t measure or predict. Your carefully constructed Euclidean geometry becomes home to chaos—where mycorrhizal networks and soil aggregates determine success far more than your perfectly squared corners ever will.


