

Spring planting success starts with avoiding wet soil, which damages structure when tilled—use the squeeze test to check readiness. Wait until soil reaches 60°F at 2–4 inches deep before planting warm-season crops like tomatoes, peppers, and beans, or seeds will rot. Harden off transplants for 7–10 days to prevent shock, and follow proper spacing guidelines: tomatoes need 24–36 inches, lettuce requires 6–8 inches. The guide ahead covers each technique in detail.
Don’t Till Wet Soil: The Squeeze Test Explained
One of the most damaging mistakes a gardener can make is working soil that contains too much moisture, which permanently compromises the soil’s structure and creates problems that persist throughout the growing season. The squeeze test determines soil readiness in seconds. Grab a handful of soil, squeeze it firmly, then open your hand.
If the soil forms a tight ball that doesn’t crumble when poked, it’s too wet for tilling or digging. Properly dried soil will break apart easily into loose pieces, indicating sufficient air pockets exist for healthy root development and beneficial organism activity. Once your soil passes the squeeze test, an electric garden tiller can efficiently prepare your beds without the fuel costs and maintenance requirements of gas-powered equipment.
When Spring Soil Is Warm Enough for Planting?

Why do experienced gardeners check soil temperature before dropping seeds into spring ground? Cold soil prevents germination, encourages rot, and stunts root development in warm-season crops.
A soil thermometer provides accurate readings that visual inspection cannot match.
Key temperature guidelines for spring planting:
- Cool-season crops (lettuce, peas, spinach) germinate at 40-50°F
- Warm-season vegetables require minimum 55°F soil temperature
- Ideal planting conditions occur at 60°F for tomatoes, peppers, beans
Insert the thermometer probe 2-4 inches deep at midmorning for the most reliable measurement.
Wireless soil thermometers eliminate the need to kneel in garden beds by transmitting temperature data directly to your phone or display unit.
Waiting for proper soil warmth guarantees strong seedling emergence and healthy root establishment.
Warm-Season Crops That Need 60°F Soil to Germinate

Understanding which vegetables require warm soil helps gardeners time their plantings for maximum success and avoid the disappointment of failed germination. Warm-season crops demand soil temperatures of at least 60°F before planting.
These heat-loving vegetables include tomatoes, peppers, cucumbers, squash, melons, beans, and corn.
Planting these crops in cooler soil, even just 5-10 degrees below ideal, results in poor germination rates, seed rot, and stunted growth.
Using a soil thermometer to verify ground temperature at planting depth guarantees seeds encounter conditions favorable for sprouting.
A soil tester digital pro provides accurate temperature readings to help determine the optimal planting time for warm-season vegetables.
Waiting for proper soil warmth, though requiring patience, produces healthier seedlings and more productive harvests.
Why Hardening Off Prevents Transplant Shock and Death

When transplants move directly from protected indoor environments to outdoor gardens without gradual acclimation, they experience transplant shock that can stunt growth or kill the plant entirely.
Hardening off strengthens plant tissues and prepares them for outdoor stresses through controlled exposure over 7 to 10 days.
The process protects plants from:
- Sudden temperature fluctuations that damage cell walls
- Intense sunlight that burns tender leaves
- Strong winds that break stems and dehydrate foliage
Start by placing transplants in a sheltered spot for two hours daily, gradually increasing outdoor time.
Bring plants inside if nighttime temperatures drop below 50°F or severe weather threatens.
A premium cold frame provides an ideal intermediate environment for hardening off seedlings while protecting them from unpredictable spring weather.
How to Harden Off Seedlings in 7 Days

A proven 7-day hardening off schedule moves seedlings from indoor protection to outdoor readiness through incremental exposure that builds plant tolerance without causing damage.
Days 1-2 place transplants in a shaded, wind-protected spot for 2-3 hours during mild midday temperatures.
Days 3-4 extend outdoor time to 4-5 hours with partial sun exposure.
Days 5-6 increase sunlight and exposure duration to 6-8 hours, including morning and late afternoon periods.
Day 7 leaves plants outside all day, bringing them in only if frost threatens.
This gradual process strengthens stems, toughens leaves, and prepares root systems for permanent outdoor conditions.
Before beginning the hardening off process, ensure your seedlings have been properly started using an indoor seedling station with adequate lighting and temperature control.
Recommended Products

EASIER SEED STARTING: Our Burpee SuperSeed tray with 36 flexible pop-out cells is designed to simplify indoor seed starting for all your favorite vegetables, flowers and herbs. Just add seed starting mix, seeds, water and light to get growing! Rows are labeled alphanumerically for seedling identification with included Plant-o-Gram diagram. Tray dimensions: 11.5" x 10-3/8" x 2-1/4"

[Value Seedling Starter Kits]: It includes:6*12 cells seedling trays and 6 grow lights. Which can provide lights and heat to the seedlings. There are 3 lights: white light, blue light, red light. It is suitable for starting seedlings that love lights. Such as: basil, rosemary, mint, herds, tomatoes, pepper shoots, strawberries, etc.
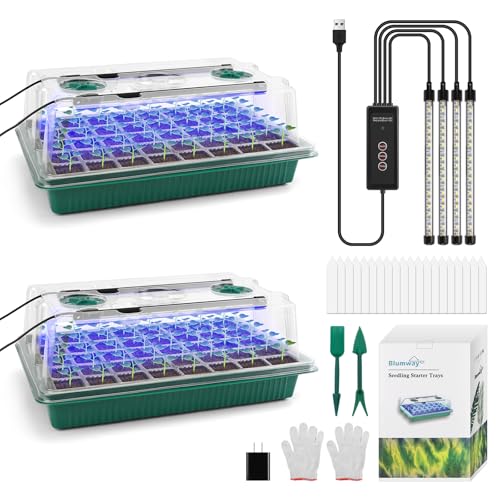
【360°Spectrum Seed Starter Tray With Grow Light】 Larger grow light cover spectrum for better seedling grow, the seed started kits have 4 full spectrum strip seed grow lights insert on the Dome of the garden plant starter kit. Now you can adjust and timed the light as you need! White& blue Light will help seedling growing faster and better. You can use this product by USB port or just plug-in,3 lighting modes & 3 timing functions (3H/6H/12H) & 5 brightness modes, the best tool for your garden
Proper Planting Depth for Tomatoes, Beans, and Cucumbers

Planting depth directly determines whether seeds and transplants develop strong root systems, emerge successfully, and produce healthy yields throughout the growing season.
Each vegetable requires specific depths for ideal growth:
- Tomatoes: Plant transplants deeper than the original container, burying the stem up to the first true leaves to encourage additional root formation along the buried stem portion.
- Beans: Sow seeds 1 to 1.5 inches deep in well-drained soil, spacing them 3 to 4 inches apart for proper air circulation and nutrient access.
- Cucumbers: Plant seeds 1 inch deep or set transplants at their original soil line depth.
Using cedar raised garden kits can make it easier to control soil depth and quality, ensuring optimal planting conditions for all your vegetables.
Recommended Products

【Garden Bed with Greenhouse Kit】3 in 1 Galvanized raised garden bed kit, 1 kit equals 3 products: garden bed, dismountable mini greenhouse, combination of garden bed with greenhouse. Perfect for you to customize your garden!
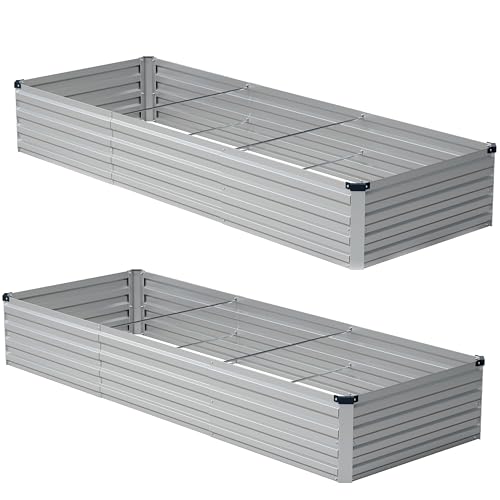
Specialized in Garden Bed: Size:10x2x1ft.Ideal choice for your gardens,yards and patio to grow vegetables,flowers,fruits and other plants.

Upgraded Durability and Structure: The thickness of this galvanized corrugated steel garden bed reaches 0.67 mm, and the thickest part can reach 1.2 mm, Multi-screw reinforcement prevents deformation and can be reused for many years
How Far Apart to Space Spring Vegetables?

Beyond planting depth, proper spacing between vegetables determines whether plants receive adequate light, nutrients, and airflow to prevent disease and maximize yields. Overcrowded plants compete for resources, resulting in stunted growth and increased susceptibility to fungal infections.
Lettuce requires 6-8 inches between plants, while tomatoes need 24-36 inches to accommodate their mature size. Beans thrive with 3-4 inch spacing, and cucumbers require 12-18 inches when grown on trellises.
Following seed packet recommendations guarantees each plant develops a strong root system without competition. Adequate spacing also simplifies weeding, watering, and harvesting throughout the growing season. Metal raised beds provide defined planting areas that make it easier to maintain proper spacing and organization for your spring vegetables.
Fix Compacted Spring Soil With Compost Before Planting

Compacted spring soil prevents roots from expanding downward, blocks water drainage, and limits the oxygen supply that plants need to absorb nutrients and grow vigorously.
Adding a 2- to 3-inch layer of finished compost and working it into the top 6 to 8 inches of soil breaks up dense clumps and creates air pockets for healthier root development.
Benefits of incorporating compost before planting include:
- Improves soil structure by binding tiny particles into larger aggregates
- Increases beneficial microbial activity that naturally aerates compacted layers
- Enhances water retention while maintaining proper drainage channels
Use a garden fork rather than a rototiller to avoid further compaction.
An outdoor potting table provides a dedicated workspace at comfortable height for mixing compost and soil amendments before transferring them to your garden beds.
Recommended Products

100% Organic & Chemical-Free – Made from natural plant-based materials, safe for all types of gardens.


NUTRIENT-RICH GROWTH: Premium cow manure compost packed with nitrogen, calcium, and iron. This organic compost fertilizer enriches soil, boosts microbial life, and supports bigger vegetables, greener lawns, and thriving flowers.
Frequently Asked Questions
Can I Plant Cool-Season Crops Before the Last Frost Date?
Yes, cool-season crops can be planted before the last frost date. Unlike warm-season vegetables, cool-season crops tolerate cold temperatures and thrive in cooler soil conditions, making them suitable for early spring planting.
What Happens if I Skip Hardening off Entirely?
Transplants face severe shock from sudden outdoor exposure, resulting in damaged or dead plants from wind, intense sunlight, and temperature fluctuations. The abrupt shift prevents proper acclimation, often causing wilting, scorched leaves, stunted growth, or complete plant failure.
How Do I Know if My Soil pH Is Wrong?
A gardener watched her tomatoes yellow and wilt despite perfect watering. Soil pH testing revealed the problem: excessively acidic conditions prevented nutrient uptake. Test kits or professional lab analysis identify pH imbalances, enabling targeted amendments to restore ideal growing conditions.
Should I Add Fertilizer Before or After Planting Seeds?
Fertilizer is typically added during soil preparation before planting seeds. However, incorporating organic matter beforehand improves soil structure and nutrient availability. Starter fertilizers can also be applied at planting time, following package directions to avoid burning seeds.
Can Overwatering Cause the Same Problems as Planting Too Early?
Yes, overwatering creates similar issues as planting too early. Both cause excessively wet soil conditions that promote root rot, prevent proper nutrient absorption, increase mold and mildew risk, and inhibit healthy root development in young plants.
Conclusion
Gardeners who follow proper spring planting techniques increase their harvest yields by up to 40% compared to those who rush the process. By testing soil moisture, waiting for appropriate temperatures, hardening off transplants gradually, and spacing plants correctly, home gardeners create ideal conditions for strong root development and vigorous growth. These simple preventive measures require minimal extra effort but deliver substantial returns throughout the growing season, transforming potential failures into thriving, productive gardens.


