

You’ll transform food-grade 5-gallon buckets into productive growing systems by drilling 6-8 drainage holes (½-inch diameter), adding a 2-inch perlite base layer, and filling with quality potting substrate. These containers accommodate determinate tomatoes, peppers, cucumbers with trellising, bush beans, and leafy greens while requiring just 0.67 cubic feet of soil per unit—significantly less than traditional raised beds. At $3-5 per bucket versus $150-300 for conventional beds, you’ll maximize vertical growing capacity with minimal investment. This guide explores complete assembly techniques, ideal cultivar selection, and long-term maintenance protocols.
Key Takeaways
- Five-gallon buckets cost $3-5 each, ideal for renters and urban gardeners with limited space or property restrictions.
- Drill 6-8 drainage holes in bucket bottoms, add 2 inches of gravel, and use quality potting soil.
- Grow tomatoes, peppers, cucumbers, beans, squash, leafy greens, and herbs in individual buckets with proper support.
- Build stable wooden frames from 2×4 lumber using galvanized screws to support multiple heavy, water-saturated buckets.
- Add seasonal compost amendments, refresh one-third of soil annually, and sanitize containers to maintain long-term productivity.
Why 5 Gallon Bucket Planters Are Perfect for Small Space Gardening
When urban gardeners face spatial constraints on balconies, patios, or concrete driveways, 5-gallon bucket planters provide a practical solution that maximizes vertical growing capacity while minimizing horizontal footprint requirements.
This container gardening method delivers exceptional space efficiency through elevated configurations that optimize photosynthetic exposure while reducing surface area consumption.
You’ll benefit from enhanced mobility solutions, as individual buckets can be repositioned to track seasonal sun patterns or relocated during extreme weather events.
The system’s modular design enables scalable urban farming operations without permanent infrastructure modifications, making it ideal for renters and property-restricted cultivators seeking productive vegetable production in confined environments.
For gardeners seeking more permanent solutions with enhanced durability, cedar raised garden kits offer a sustainable alternative that combines longevity with aesthetic appeal.
Recommended Products

Durable and Sturdy: Made of 300G thickened nonwoven fabric, Jorvila grow bags are wear-resistant, washable, easy to clean and reusable; At the end of use, you can simply clean it and fold it up for storage after drying


5 Gallon Plastic Pots 5 Pack:12-inch plastic pots with a 5-gallon capacity provide ample space for plant growth(5 gallons of packed loose soil or 3.2 gallons of liquid);this pack includes five pots for handling multiple planting projects simultaneously
What Vegetables Thrive in 5 Gallon Bucket Planters

Although container volume directly influences root development capacity, 5-gallon buckets provide sufficient substrate depth (14+ inches) to support determinate tomato cultivars, Capsicum varieties (bell and hot peppers), and vining cucurbits when properly trellised.
Your container gardening success depends on strategic vegetable selection aligned with root architecture requirements. Bush beans, compact squash varieties, and leafy greens (lettuce, kale, Swiss chard) thrive within 5-gallon parameters.
You’ll achieve peak yields by selecting dwarf or patio-specific cultivars bred for restricted root zones. Additionally, herbs (basil, oregano, thyme) and ornamental companion plants effectively utilize remaining bucket capacity while supporting integrated pest management strategies.
For gardeners seeking more permanent solutions, metal raised beds offer superior durability and enhanced growing conditions compared to bucket containers.
Recommended Products

GROW LIKE A PRO – This seed spacer tool ensures perfect plant spacing, optimizing your garden space for maximum harvests. Easily grow a lush, productive garden full of vegetables, herbs, and flowers.
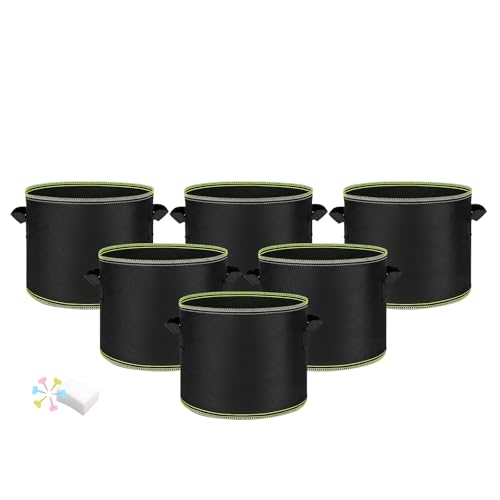
🌿 【Breathable Material】Fabric pots are made of breathable double layer non-woven fabric that ensures good ventilation to prevent root rot and promote healthy root growth.

Practical Design: This 6-inch net pot lid is fits good on standard 3.5 and 5 gallon buckets.Also fit for 5 gallon Lowe's bucket and home depot buckets. The diameter wide Lip is 12.4".
How to Prepare Your 5 Gallon Buckets for Planting Success

Proper bucket preparation determines substrate drainage efficiency and prevents anaerobic soil conditions that promote root pathologies.
Adequate drainage infrastructure in container systems is fundamental to maintaining aerobic root environments and preventing disease development.
You’ll need to execute specific drainage methods before introducing growing media. Drill 6-8 holes (½-inch diameter) distributed evenly across the bucket’s base to facilitate gravitational water movement and enhance oxygen penetration to the root zone. For larger garden setups, consider supplementing manual drainage with automatic drip irrigation systems to maintain consistent moisture levels.
Essential bucket preparation steps:
- Clean containers thoroughly with 10% bleach solution to eliminate fungal spores and bacterial contaminants
- Create drainage layer using 2 inches of perlite or gravel to prevent substrate compaction
- Insert landscape fabric between drainage layer and soil to maintain separation
- Sterilize buckets if reusing from previous growing seasons
Recommended Products

DWC Bucket +Top Drip Kit: The upgraded hydroponic system incorporates a unique top drip irrigation design, facilitating water circulation to maintain nutrient solution freshness and promote efficient absorption
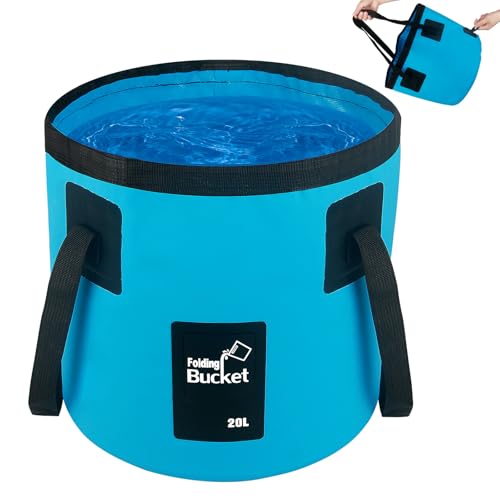
Ultra-Compact 5 Gallon Bucket:This collapsible bucket folds to a slim profile (13"L x 5"W), saving space in backpacks, car trunks, or kitchen cabinets. Weighing only 250g, it’s a lightweight camping water container, RV supply, or beach bucket. Hang this cleaning bucket on hooks or stash under sinks—perfect for decluttering small cleaning tools, household essentials, or first apartment supplies.

Durable & Corrosion-proof Material: Our 5-gallon DWC hydroponics grow system features a PP planting bucket that is sturdy, durable, corrosion-proof, and temperature-resistant. Perfect for long-term use without deformation, ideal for plant hydroponics.
Building Your First Wooden Frame Bucket Planter Box

Once drainage optimization concludes, you’ll shift to constructing the structural framework that elevates your buckets while maximizing growing efficiency.
Your wooden frame requires eight 2x4x8 lumber pieces for a quad-bucket configuration, ensuring load-bearing capacity for soil-filled containers. Assemble the planter box using galvanized screws to prevent moisture-induced deterioration.
Position horizontal supports at heights accommodating 14-inch bucket depth while maintaining ergonomic accessibility. Install vertical posts with adequate spacing to prevent bucket contact with frame edges, ensuring proper air circulation around root zones.
The completed wooden frame structure provides stability for heavy, saturated growing media while extending planter longevity through elevated positioning. For additional storage solutions beyond planting, consider a firewood storage rack to organize your gardening tools and supplies nearby.
Cost Comparison: Bucket Planters Vs Traditional Raised Beds

Your budget determines whether bucket planters or traditional raised beds fit your cultivation strategy. Cost analysis reveals bucket systems require minimal capital investment—approximately $3-5 per container versus $150-300 for comparable raised bed construction.
Budget considerations include reduced soil volume requirements (0.67 cubic feet per bucket compared to 32+ cubic feet for standard beds) and elimination of lumber framework expenses.
For gardeners seeking alternative containment solutions, large compost tumblers can further optimize your gardening investment by converting organic waste into nutrient-rich amendments for your bucket planters.
Financial advantages of bucket planters:
- Lower initial material costs with recycled food-grade containers
- Reduced soil amendment expenses through targeted fertilization
- Minimized infrastructure investment for temporary growing spaces
- Decreased long-term maintenance expenditures due to modular replacement capability
Step-by-Step Assembly Guide for Quad Bucket Planters

Construction of quad bucket planters requires eight 2x4x8 lumber pieces, four 5-gallon food-grade buckets, exterior-grade fasteners (2.5″ deck screws), and basic carpentry tools including a circular saw, drill/driver, and measuring tape.
Begin by cutting lumber to precise dimensions: four 36″ vertical posts, eight 24″ horizontal rails, and four 11″ support braces. Assemble the frame using pocket-hole joinery or direct screwing, ensuring 90-degree angles throughout.
Position buckets within compartments, maintaining 12″ spacing for ideal air circulation. Drill drainage holes (minimum ½” diameter, 6-8 holes per bucket) to prevent waterlogging.
This configuration maximizes bucket planter benefits while enhancing gardening accessibility for practitioners with mobility limitations. For larger-scale garden setups, consider integrating a raised bed irrigation kit to automate watering and improve overall efficiency.
Creative Customization Ideas for Your Bucket Planter Boxes

Beyond structural assembly, aesthetic modifications transform standard bucket planters into personalized garden installations that complement your outdoor environment.
Strategic customization elevates utilitarian containers into cohesive design elements that integrate seamlessly with your landscape’s established aesthetic framework.
You’ll maximize visual appeal through deliberate design choices that enhance functionality.
- Decorative painting: Apply exterior-grade latex paint in coordinating color schemes, ensuring proper surface preparation with primer for ideal adhesion to plastic bucket surfaces.
- Unique labeling: Install weatherproof plant markers or stenciled cultivar names for precise variety identification throughout the growing season.
- Textural cladding: Attach natural materials like bamboo screening, reclaimed wood panels, or galvanized metal sheeting.
- Vertical integration: Incorporate adjustable trellis systems supporting determinate and indeterminate growth habits. Consider complementing your bucket planters with wall mounted grow shelves to maximize your growing space vertically.
Maintaining and Refreshing Your Bucket Planter Soil Season After Season

While container substrates inevitably experience nutrient depletion and structural degradation through repeated cropping cycles, you’ll extend growing medium viability through systematic soil management protocols.
Implement seasonal amendments incorporating compost and organic fertilizers to replenish soil nutrients between plantings. Monitor drainage solutions by inspecting bottom holes for blockages and replacing deteriorated materials.
Conduct bucket maintenance by removing accumulated mineral deposits and sanitizing containers with dilute bleach solutions between seasons. Refresh one-third of existing substrate annually, integrating aged compost to maintain ideal tilth and porosity.
For efficient compost management at scale, consider investing in a stainless steel compost bin to process your garden waste and create nutrient-rich amendments for your bucket planters.
This approach sustains productive growing conditions while reducing replacement costs and environmental impact throughout multiple cultivation seasons.
Frequently Asked Questions
Can 5 Gallon Bucket Planters Be Used Indoors or in Greenhouses?
You can successfully utilize 5-gallon bucket planters for indoor gardening and greenhouse setups, provided you guarantee adequate drainage, proper light exposure, controlled temperature ranges, and sufficient ventilation to maintain ideal growing conditions for your selected crops.
How Do You Prevent Buckets From Blowing Over in Strong Winds?
Like anchoring a ship in turbulent seas, you’ll guarantee bucket stabilization by adding ballast weight to container bottoms, positioning wind barriers strategically around your growing area, or securing planters to deck railings using heavy-duty fasteners.
What Type of Paint Is Safe for Decorating Food-Grade Bucket Planters?
You’ll need food-safe coatings like milk-based paints or plant-derived formulations for exterior decoration. Eco-friendly options include mineral-based paints that won’t leach phytotoxic compounds into your substrate, ensuring ideal plant health and safe cultivation practices.
Do Bucket Planters Attract More Pests Than Traditional Ground Gardens?
Container gardening doesn’t inherently attract more pests than ground gardens. You’ll find pest management strategies remain similar, though elevated bucket planters can reduce soil-borne pathogens and certain crawling insects while potentially increasing exposure to airborne pests.
How Many Years Can the Same Bucket Be Reused for Planting?
You’ll find bucket lifespan exceeds 10+ years with proper care, though UV degradation occurs faster outdoors. Maintain planting rotation annually by replacing soil, sterilizing containers between crops, and monitoring structural integrity for cracks or brittleness.
Conclusion
You’ve now got the blueprint for maximizing photosynthetic capacity in minimal square footage. As your bucket planters become a verdant assembly line of fresh produce, you’ll optimize soil amendments, monitor pH levels, and adjust irrigation schedules based on each cultivar’s requirements. Don’t hesitate to experiment with different substrate compositions or companion planting configurations. Your compact growing system’s modular design means you’ll continuously refine drainage rates, root zone temperatures, and nutrient delivery protocols throughout successive growing seasons.


